Android -TextViewとImageView-
Java、またはxml利用してのレイアウトの記述ができます。
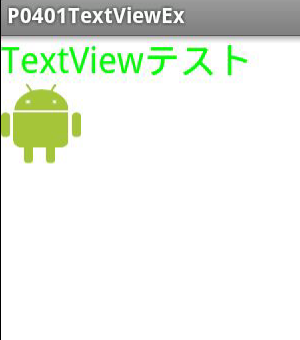
今回は、テキストとイメージ表示を行うサンプルです。
イメージファイルが別途必要です。(今回は、droid80.png(80×80)を使用しています。)
resフォルダ内にdrawableフォルダを作成後、ご用意されたイメージファイルを配置して下さい。
サンプル1 --Javaでレイアウト等を記述--
P0401TextViewEx.java
import android.app.Activity;
import android.graphics.Bitmap;
import android.graphics.BitmapFactory;
import android.graphics.Color;
import android.os.Bundle;
import android.widget.ImageView;
import android.widget.LinearLayout;
import android.widget.TextView;

public class P0401TextViewEx extends Activity {
    private final static int WC=LinearLayout.LayoutParams.WRAP_CONTENT;

    @Override
    public void onCreate(Bundle savedInstanceState) {
        super.onCreate(savedInstanceState);

        //レイアウトの生成
        LinearLayout layout =new LinearLayout(this);
        //背景色の指定
        layout.setBackgroundColor(Color.rgb(255, 255, 255));
        //整列方向の指定
        layout.setOrientation(LinearLayout.VERTICAL);
        //表示するビュー(レイアウト)の指定
        setContentView(layout);

        //テキストビューの生成
        TextView textView =new TextView(this);
        //表示文字列の指定
        textView.setText("TextViewテスト");
        //テキストの文字サイズ指定
        textView.setTextSize(24.0f);
        //テキスト文字色の指定
        textView.setTextColor(Color.rgb(0, 255, 0));
        //コンポーネントのサイズ指定
        textView.setLayoutParams(new LinearLayout.LayoutParams(WC,WC));
        //レイアウトへのコンポーネントの追加
        layout.addView(textView);

        //画像の読み込み
        Bitmap bitmap=BitmapFactory.decodeResource(getResources(), R.drawable.droid80);

        //イメージビューの生成
        ImageView imageView =new ImageView(this);
        //イメージの指定
        imageView.setImageBitmap(bitmap);
        //コンポーネントのサイズ指定
        imageView.setLayoutParams(new LinearLayout.LayoutParams(WC,WC));
        //レイアウトへのコンポーネントの追加
        layout.addView(imageView);
    }
}
void setOrientationメソッドの整列方向の定数
| 定数 | 機能 |
|---|---|
| LinerLayout.HORIZONTAL | 水平方向 |
| LinerLayout.VERTICAL | 垂直方向 |
LinerLayout.LayoutParamsコンストラクタで指定できる定数
| 定数 | 機能 |
|---|---|
| LinerLayout.LayoutParams.WRAP_CONTENT | コンポーネントの幅、もしくは高さ |
| LinerLayout.LayoutParams.FILL_PARENT | 画面いっぱいの幅、もしくは高さ |
サンプル2 --xmlでレイアウト等を記述--
上記のサンプル1をxmlに書き換えると以下のようになります。

res/values/string.xml
<?xml version="1.0" encoding="utf-8"?>
<resources>
    <string name="app_name">P0401TextViewEx2</string>
    <string name="textview">TextViewテスト</string>
    <string name="robot">Androidロボットくん</string>
</resources>
res/layout/main.xml
<?xml version="1.0" encoding="utf-8"?>
<LinearLayout xmlns:android="http://schemas.android.com/apk/res/android"
    android:layout_width="fill_parent"
    android:layout_height="fill_parent"
    android:orientation="vertical"
    android:background="#ffffff">

    <TextView
        android:layout_width="wrap_content"
        android:layout_height="wrap_content"
        android:text="@string/textview"
        android:textSize="24sp"
        android:textColor="#00ff00"/>

    <ImageView
        android:layout_width="wrap_content"
        android:layout_height="wrap_content"
        android:src="@drawable/droid80"
        android:contentDescription="@string/robot"/>
</LinearLayout>
P0401TextViewEx2.java
import android.app.Activity;
import android.os.Bundle;

public class P0401TextViewEx2 extends Activity {
    @Override
    public void onCreate(Bundle savedInstanceState) {
        super.onCreate(savedInstanceState);
        setContentView(R.layout.main);
    }
}